How to Repot a Houseplant (Without Killing It)
How to repot a houseplant step by step: picking the right pot size, soil type, and what to do after so your plant actually recovers.
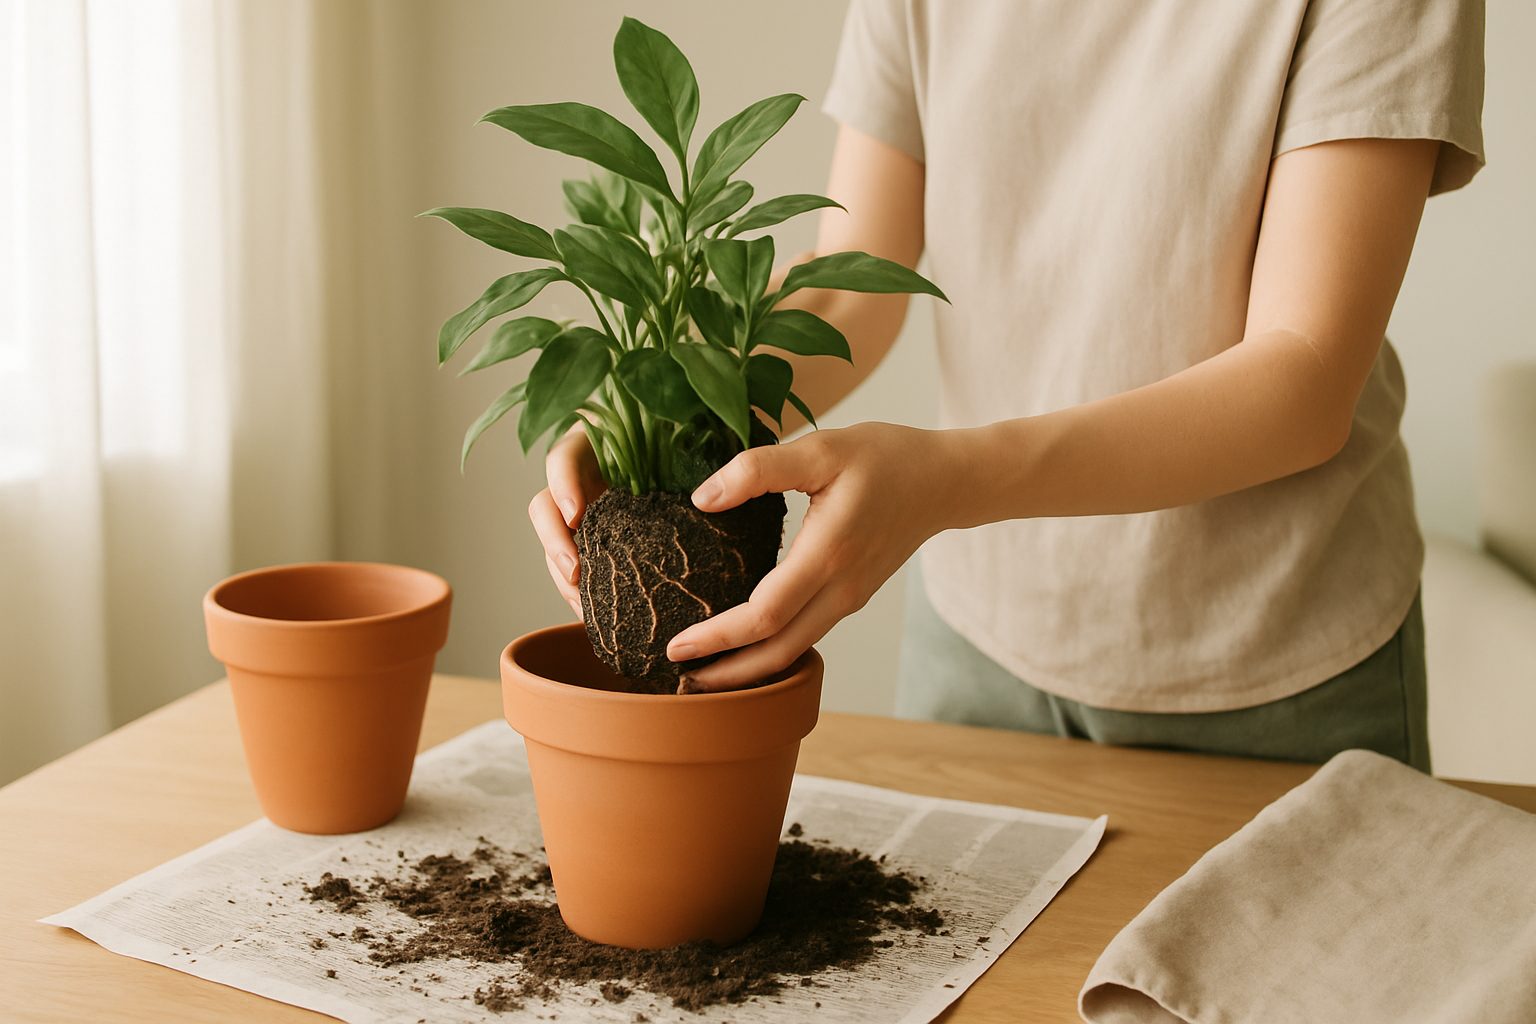
Plants are tougher than they look. How to repot a houseplant is a 15-minute job once you have done it once, and the most common outcome is a happier plant. This guide walks you through the whole process: which pot to choose, what soil to use, and the few mistakes that actually do cause problems.
Quick answer
When: Spring is best, but any point in the growing season works. Avoid winter unless the plant is really struggling.
New pot size: 1 to 2 inches wider than the current pot. Going bigger sounds generous but causes problems.
Steps at a glance:
- Water the plant the day before.
- Choose a pot with drainage holes, 1 to 2 inches wider.
- Remove the plant, loosen the root ball gently.
- Trim any dead or rotten roots.
- Add fresh potting mix, position the plant, fill and firm gently.
- Water thoroughly. Skip fertilizer for 4 to 6 weeks.
Does your plant actually need repotting?
The clearest signs:
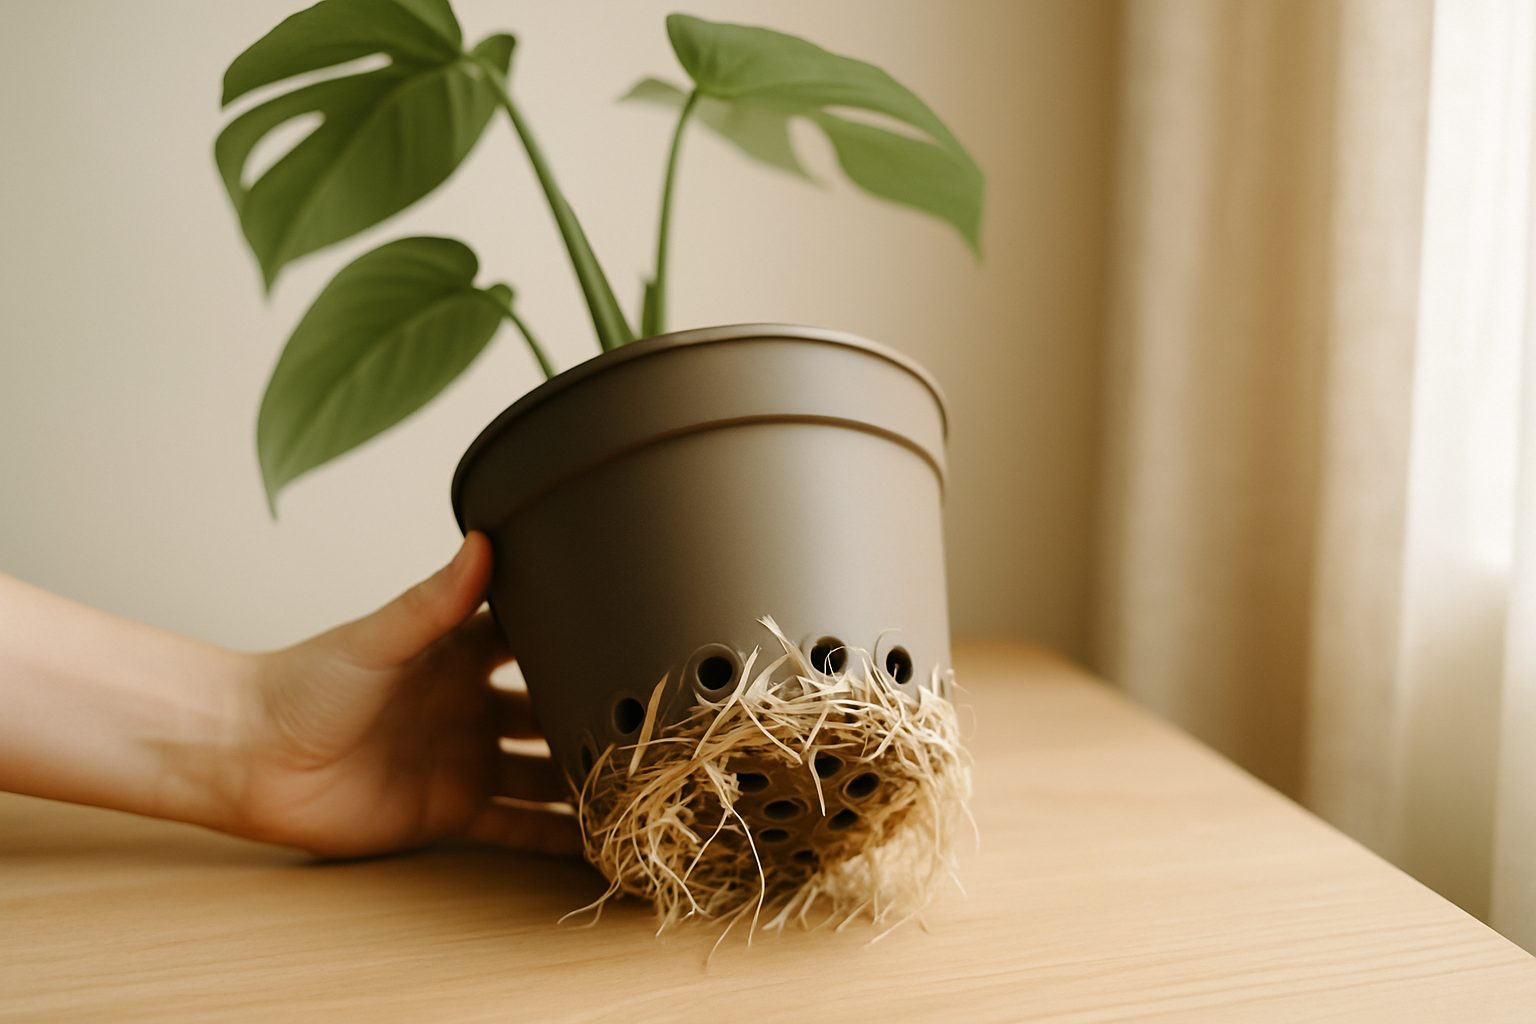
- Roots are growing out the drainage holes. A couple of stray roots are fine. A dense mat means it is time.
- The soil dries out much faster than it used to. When the pot is mostly roots and not soil, water runs straight through.
- The plant looks top-heavy or keeps tipping the pot over. Above-ground growth has outpaced root space.
- Growth has stalled for a full season despite good light and consistent watering.
You do not need to repot on a strict schedule. The signs matter more than the calendar.
A note on rootbound plants
Snake plants, peace lilies, ZZ plants, and spider plants are often described as loving to be rootbound. This is partly true. They tolerate snug conditions better than most, and can stay in the same pot for years without suffering.
But no plant benefits from staying in the same depleted soil forever, even if it does not need a larger pot. If yours has been in the same container for three or more years, a soil refresh is worth doing even if the roots still look fine.
When to repot (and when to hold off)
Spring is the sweet spot. Plants are coming out of their slow winter phase, new growth is starting, and they bounce back from the disruption quickly.
Summer works if the plant needs it. Growth is active and recovery is fast.
Winter: wait if you can. Most houseplants slow down over winter, and repotting during a rest period adds unnecessary stress. If the plant is clearly suffering (roots completely blocking drainage, soil breaking down completely), go ahead. Otherwise, wait for March.
Hold off if:
- You just brought the plant home. Give it two to four weeks to settle before repotting. A plant fresh from the nursery is already adjusting to new light, humidity, and watering. Adding repotting stress on top makes it harder to tell what is wrong if problems show up.
- The plant is in full bloom. Let it finish flowering first.
- The plant is already sick or stressed. Repotting does not fix root rot, pests, or disease, and the added disruption slows recovery.
What you will need
- A new pot, 1 to 2 inches wider than the current one, with drainage holes
- Fresh potting mix suited to the plant type (more on this below)
- A trowel or large spoon
- Newspaper, a tray, or a trash bag to contain the mess
- Clean scissors or pruning shears
- A watering can
If you are repotting into a terracotta pot, covering the drainage hole loosely with a small piece of mesh or a coffee filter keeps soil in without blocking water flow.
How to repot a houseplant: step by step
1. Water the plant the day before.
Moist soil holds the root ball together when you slide the plant out. Bone-dry soil crumbles and makes the roots harder to handle.
2. Prepare the new pot.
Add a few inches of fresh potting mix to the bottom. The plant should sit at the same depth as before, so adjust the base layer as needed.
3. Remove the plant.
Tip the pot sideways and gently slide the plant out. For plastic nursery pots, squeeze the sides a few times first. For ceramic or terracotta, run a butter knife around the inside edge to break the seal. If it is stuck, try more squeezing and gentle pulling rather than yanking from the stem.
4. Examine the roots.
Healthy roots are pale (white or light tan) and firm. Dark, mushy, or slimy roots are rotten and need to go. Trim them with clean scissors, cutting back to healthy tissue. If you find widespread rot, our guide to root rot in houseplants walks you through the full rescue process.
5. Loosen the root ball.
Gently tease the outer roots apart with your fingers. Roots that have been circling the inside of the pot need to be straightened out, otherwise they keep wrapping and can eventually restrict growth. You do not need to remove all the old soil. Loosening the outer portion is enough.
6. Place the plant.
Lower the plant into the prepared pot and center it. The base of the stem should sit at roughly the same depth as before, with about an inch of clearance between the soil surface and the rim. That gap lets you water without it spilling straight over the edge.
7. Fill and firm gently.
Add fresh potting mix around the sides, pressing it in lightly to eliminate air pockets. Do not compact it hard. The soil should feel settled, not packed.
8. Water thoroughly.
Water until it runs freely out the drainage holes. This settles the soil and gets the roots in contact with the new mix. If the soil sinks or gaps appear, top it off with a little more mix.
9. Aftercare.
Bright indirect light for the first two to three weeks. Skip direct sun, which adds stress to a plant that has just been disturbed. Hold off on fertilizing for four to six weeks. Fresh potting mix usually has nutrients built in, and adding more right away can burn tender new roots.
Choosing the right pot
Size matters more than you might expect. Going up by 1 to 2 inches in diameter gives roots room to grow without leaving too much empty soil around them. A pot that is too large holds excess moisture, which is one of the most common causes of accidental overwatering.
Drainage holes are not optional. Roots sitting in standing water rot. If a decorative pot has no drainage hole, use it as a cachepot: keep the plant in its plastic nursery pot and set that inside the decorative one. Lift the inner pot out to water, let it drain fully, then put it back. Much easier than trying to drill holes or hoping the excess water somehow disappears.
Pot material comparison:
| Material | Best for | Trade-off |
|---|---|---|
| Terracotta | Succulents, cacti, drought-tolerant plants | Dries out fast; gets heavy when large |
| Plastic | Tropical plants, moisture-loving plants | Light and cheap; roots can stay wet longer |
| Glazed ceramic | Most houseplants | Heavier; holds moisture similar to plastic |
| Fabric grow bags | Fast-draining setups | Dries quickly; less decorative |
Which soil to use
Standard all-purpose potting mix works for most tropical houseplants. A few plant families do better with something more specific:
- Succulents and cacti: cactus or succulent mix, or regular potting mix cut with 50% coarse perlite or coarse sand
- Aroids (monstera, pothos, philodendron): chunky aroid mix, or potting mix with added orchid bark and perlite for better airflow around the roots
- Orchids: orchid bark only. They suffocate in regular potting soil.
- Most tropical plants (peace lily, spider plant, ferns): standard potting mix with 20 to 30% perlite added helps prevent the soil from compacting over time
For a detailed look at soil mixes by plant type, our guide to the best soil for houseplants covers the options.
After repotting: what is normal and what is not
Most plants come through repotting without drama.
This is fine:
- Drooping or slight wilting for a day or two
- No new growth for two to four weeks (the plant is redirecting energy to root establishment)
- Leaf tips looking a little dull initially
Worth checking:
- Yellowing that spreads to multiple leaves within a week
- Stems going mushy or soft at the base
- Wilting that does not recover within a week of repotting
Those warning signs often point to overwatering post-repot or root rot that was already present. Cut back on watering, check that drainage is working, and if needed, unpot the plant to inspect the roots again.
If overwatering is a recurring issue for you, our guide on how often to water houseplants explains how to read the signs before you reach for the watering can.
Top-dressing: the option for large plants
Have a statement plant that is too big or too heavy to move? Top-dressing is a useful middle ground.
Scrape off the top 2 to 3 inches of old soil and replace it with fresh potting mix. You are not upsizing the pot or disturbing the root system, but you are improving the surface soil structure and bringing in fresh material that holds air and water better than worn-out mix. Do this every one to two years for plants that are too unwieldy to fully repot. Continue fertilizing during the growing season as normal.
Common repotting mistakes
- Pot too big. More empty soil around the roots means more moisture retention. One to two inches wider, not four or five.
- No drainage hole. Use the cachepot method instead of planting directly into a decorative pot.
- Rocks or gravel in the bottom. This does not improve drainage. It creates a waterlogged zone right at root level by raising the “perched water table” effect. Use good soil all the way through.
- Burying the stem. The crown of the plant should sit at the same depth as before. Burying it deeper invites crown rot.
- Repotting right after purchase. Wait two to four weeks. The plant needs to settle first.
- Fertilizing right after repotting. Fresh soil has nutrients already. Wait four to six weeks before feeding.
- Repotting while the plant is sick. Fix the underlying problem first, then repot once the plant has stabilized.
For more on catching overwatering problems early, before they become root rot, see our guide on recognizing an overwatered plant.
FAQ
How often should I repot my houseplant?
Fast growers like pothos and spider plants usually need repotting every one to two years. Slow growers like ZZ plants, snake plants, and cacti can go three to five years between repots. Go by the signs (roots escaping, soil drying unusually fast) rather than a fixed schedule.
Should I repot a plant right after buying it?
No. Wait two to four weeks. The plant is already adjusting to a new environment, and repotting right away adds another layer of stress before it has settled in.
Is it better to repot with wet or dry soil?
Lightly moist is the sweet spot. Water the day before. Bone-dry soil crumbles and is hard to work with. Soaking wet soil is heavy, messy, and rough on the roots.
What do I put in the bottom of the pot?
Nothing except potting mix. Gravel, rocks, or pottery shards at the base do not improve drainage. They actually raise the waterlogged zone higher into the pot. A well-draining soil mix and a pot with drainage holes is all you need.
How long does transplant shock last?
Usually one to three days of drooping. Most plants perk back up once the roots settle into fresh soil. If wilting lasts more than a week or spreads to leaf yellowing, check whether you have overwatered or have a drainage issue.
Can I repot in winter?
It is better to wait if you can. Most houseplants slow their growth over winter, so repotting during that rest phase adds stress they are less equipped to handle. Spring is a better time. The exception is a plant that is genuinely suffering and cannot wait.
Repotting gets easier every time you do it. And for most plants, a slightly imperfect repot still ends better than staying in depleted soil for another two years. If you are still building confidence with houseplant care in general, our guide to the best plants for beginners is a good place to start.
Sources and further reading: Penn State Extension, Repotting Houseplants; University of Arkansas Division of Agriculture Cooperative Extension, Repotting Houseplants; The Royal Horticultural Society (RHS), Re-potting houseplants.
Keep reading
Related guides
 Guides
 How to Propagate Pothos in Water (Step by Step)
Learn how to propagate pothos in water with a simple step-by-step guide, and how to transfer your cuttings to soil without losing them.
How Often Should You Water Houseplants? A Simple Guide
How often to water houseplants? Skip the calendar. Learn the finger test, frequency ranges by plant type, and how to water the right way.
 Plant Lists
 Best Indoor Plant Stands (and How to Actually Choose One)
Choosing an indoor plant stand isn't just about looks. Here's how to pick the right height, weight capacity, and drainage setup for your plants.